This tool allows you to search for a species available via the NBN Atlas (including at higher taxonomic levels) and map their distribution.
The selection of taxa (species, genus etc.) uses a method called auto-complete. As you enter letters, the system searches for taxa that match what you have typed. The auto-complete function should support browsers on any system including tablets.
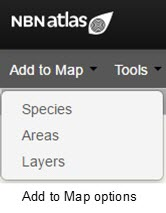
From the menu option, select “Add To Map” and then “Species”.
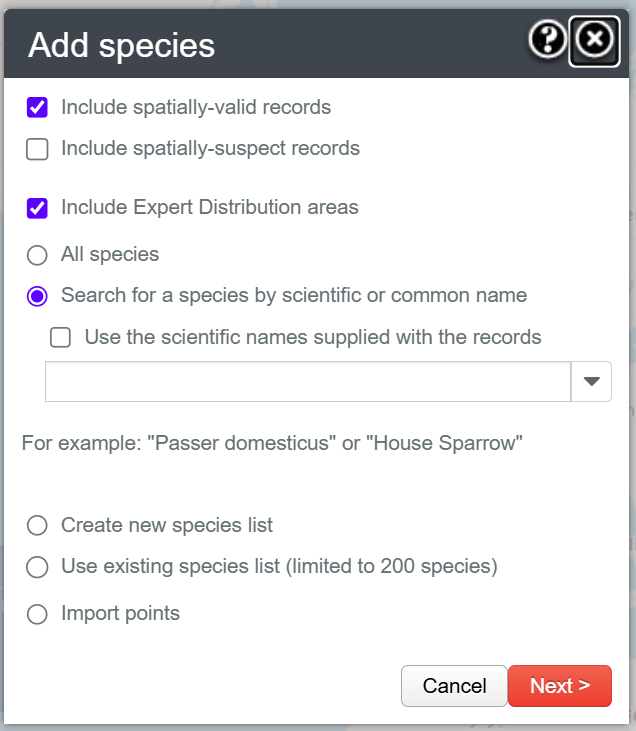
There are five add species options, choose which option suits your requirements:
- All species within an area.
- Search for a species by scientific or common name.
- Create a new list of species.
- Use an existing species list.
- Import points.
Press “Next”.
The Upload points has an additional step to upload a user’s file and you will be presented with a screen like the one below:
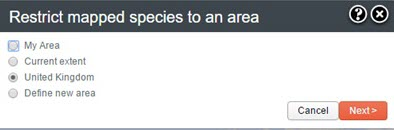
Select an area for restricting the species occurrences mapped
If you have a predefined area already mapped, then an option is available to apply it: For example, “My Area”.
If you have already zoomed the map into a specific area of interest, then the ‘Current Extent’ option is available to show both specific species or all species in that zoomed area.
In the add “All species” option, “United Kingdom” is not available as default due to potential size problems.
Note the “Define new area” will involve an extra step (please refer to Add Area for additional information).
Press “Next” once the area has been defined and a new layer will be added to the list of layers on the left hand side of the screen and to the map, showing the species (or higher taxa) distribution.
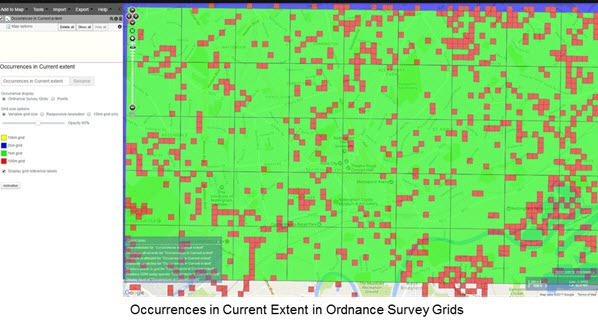
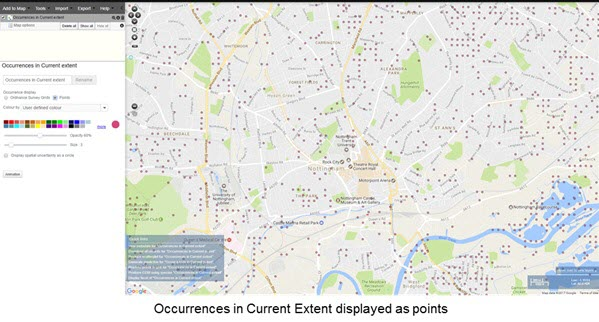
NOTE: that the layer name can be edited in the legend as needed.
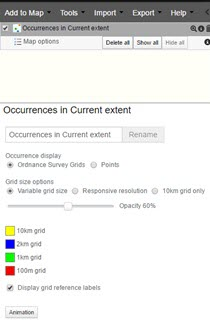
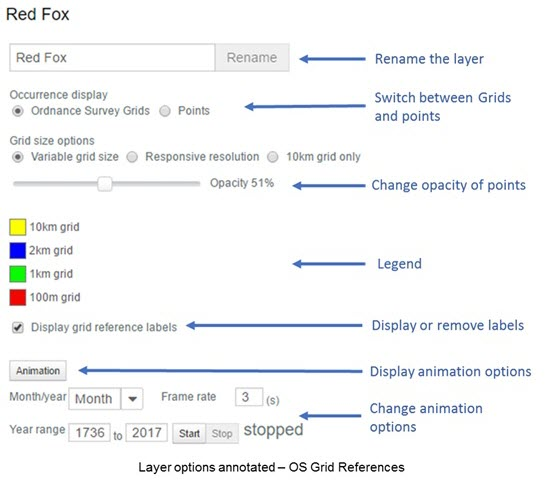
When displaying as Ordnance Survey grid squares you can display as:
- Variable grid size –shows grid squares of varying sizes (as in example above)
- Responsive resolution – size of square changes as zoom in and out
- 10km grid only
- You can also change the opacity of the squares and check or uncheck the box to show (or remove) grid reference labels
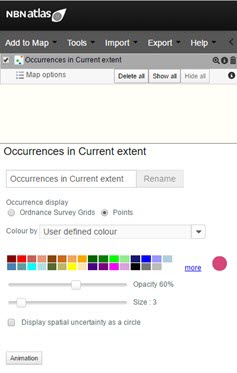
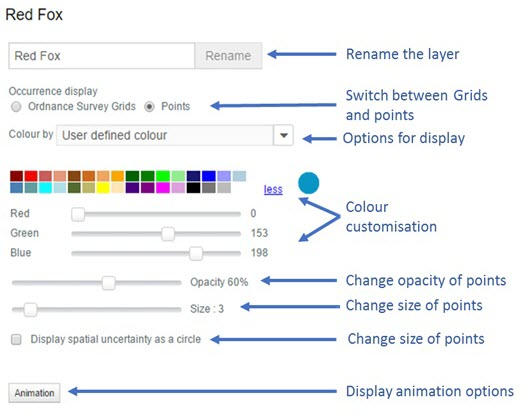
When displaying as points you can change the colour opacity and size for the points manually.
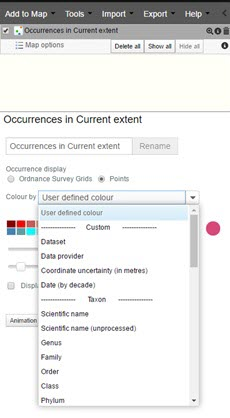
There are a large number of options for what property to colour the points by when clicking the arrow to the right of the “Colour by” box a drop-down list of the options will appear. Depending on the property chosen another box may appear which more options (see below). By default, it will show all options, individual selections can be made by checking the box and then choosing either “Create layer with selection” or “Create layer without selection” below the list.
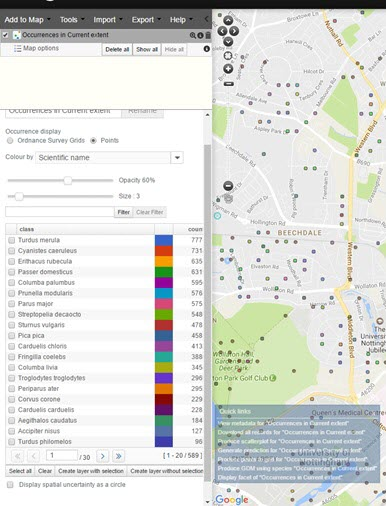
Search for a species by scientific or common name
To search for a species to add to the map, select the “Search for species by scientific or common name” radio button (this is the default).
Hint: “Species” in the Spatial Portal can be generalised to any higher taxonomic level e.g. genus, family, order or class.
Autoselection of names is available, start typing the scientific or common name and a series of matching names are revealed in a drop down list. Select your required name.
If the name is not found, it may be because:
It may not be available yet in the Atlas.
It may be listed under a more recent scientific name or common name.
The spelling may have to be checked.
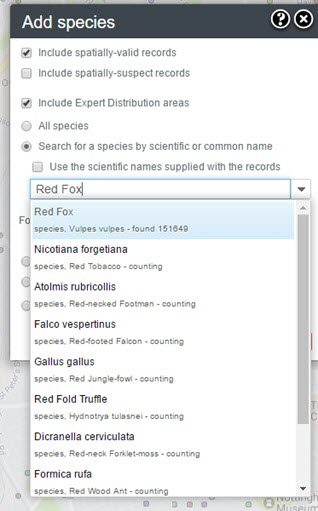
Once a name has been selected, press “Next”.
All known occurrences matching that name will be plotted on the map for your defined area. By default they display as Ordnance Survey grid squares, but can be changed to points (as above).
The layer is added to the active layers list. This allows you to manage the various layers.
Species Occurrence Information pop-up
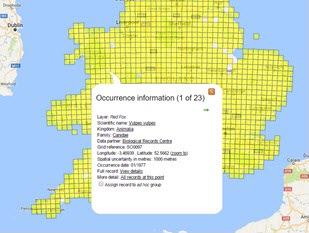
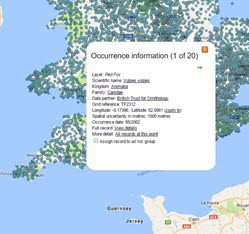
Clicking on the grid square or species point on the map will pop-up information about that occurrence and link to any related data.
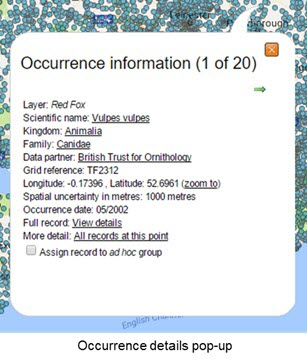
If there are multiple observations for a location, you can page through the list, one occurrence record at a time by clicking on the arrow.
Species Layer Functions
After adding a species layer, a number of options are available in the left hand pane. The following annotated screenshots explain what they are.
Was this article helpful?
That’s Great!
Thank you for your feedback
Sorry! We couldn't be helpful
Thank you for your feedback
Feedback sent
We appreciate your effort and will try to fix the article